How to turn ON camera on a laptop
Having a built-in camera on your laptop can be a great way to communicate with family and friends, or even for work. However, if you can’t turn the camera on, then you are unable to use it. Fortunately, there are a few different ways to turn on your laptop camera. In this article, we will discuss some of the more common reasons a laptop camera may not turn on, and then walk you through step-by-step instructions on how to turn on your laptop camera.
Content of the page
If you have a Dell laptop, you may want to check the article on how to turn ON a Dell laptop camera.
Common Reasons for Camera Not Turning On
| Hardware and connections not properly set up |
| Camera software not installed |
| Camera permissions not granted |
| Privacy settings blocking camera access |
| Outdated or corrupted camera drivers |
| Malware or viruses affecting camera functionality |
| Privacy settings preventing camera from working |
Before we get started with the instructions on how to turn on your laptop camera, let’s first discuss some of the most common reasons why your laptop camera might not be turning on. If you’ve already checked these steps, you can skip ahead to the step-by-step instructions.
1. Check Hardware and Connections
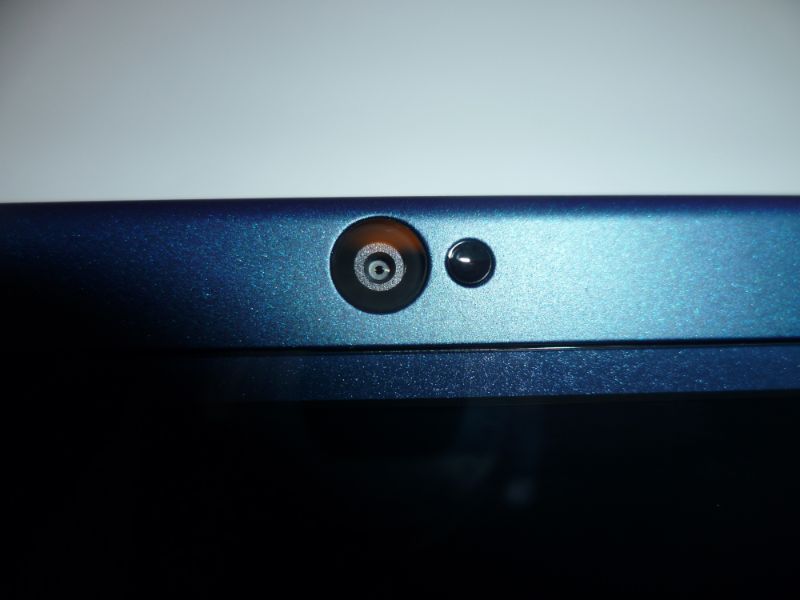
The first thing to check if your laptop camera isn’t turning on is to make sure all the hardware and connections are in place. Depending on the type of laptop you have, the camera may be located either on the top or the bottom of the screen. If the camera is a part of the laptop, then check to make sure the lens is not covered with dust or anything else.
2. Ensure Camera Software is Installed
Your laptop may have the hardware necessary to use a camera, but it may not have the software installed. Make sure that the necessary software is installed on your laptop in order for the camera to work. This may vary depending on the type of laptop you have, so be sure to check any user manuals or operating system documentation for more information.
3. Grant Camera Permissions
If you’ve ensured that the hardware and software are in place, then the last step is to make sure that the necessary permissions have been granted for the camera to work. If you are using a Windows-based laptop, then you will need to go to the Control Panel and check the settings for the camera. This allows you to grant access to the camera. If you are using a Mac laptop, then you will need to go to the System Preferences and check the settings for the camera.
If you later wish how to turn the camera OFF for security reasons, here we have an article on how to turn OFF camera of a laptop.
Step-by-Step Guide to Turn On the Camera

| Step | Description |
|---|---|
| 1. Locate the Camera on Your Laptop | Identify the physical location of the camera on your laptop. |
| 2. Check for a Physical Camera Switch | Check for a physical switch that turns the camera on or off. |
| 3. Use Function Keys or Shortcut Keys | Utilize function keys or shortcut keys to enable the camera. |
| 4. Access the Camera through Device Settings | Adjust camera settings through the Control Panel (Windows) or System Preferences (Mac). |
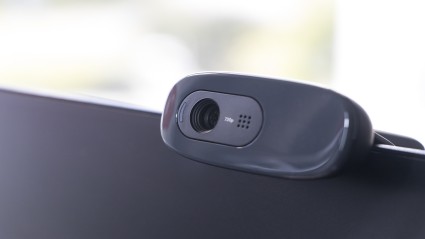
1. Locate the Camera on Your Laptop
The first step in turning on your laptop camera is to locate it. Depending on the type of laptop you have, the camera may be located either on the top or the bottom of the screen. If the camera is a part of the laptop, then it should have a small lens that is located either on the top or the bottom of the screen.
2. Check for a Physical Camera Switch
The next step is to check for a physical camera switch. Depending on the type of laptop you have, the camera may have a physical switch located either on the side or the top of the laptop. If the switch is in the “off” position, then the camera will not work. Make sure the switch is in the “on” position in order for the camera to work.
3. Use Function Keys or Shortcut Keys
Some laptops may have a function key or a shortcut key that will turn on the camera. Depending on the type of laptop you have, you may have to press the “Fn” key along with another key in order to turn on the camera. Refer to your laptop’s user manual or operating system documentation for more information.
4. Access the Camera through Device Settings
The last step is to access the camera through the device settings. If you are using a Windows-based laptop, then you will need to go to the Control Panel and check the settings for the camera. If you are using a Mac laptop, then you will need to go to the System Preferences and check the settings for the camera. This allows you to turn on the camera and grant access to the camera.
Troubleshooting Camera Issues
If you are having trouble turning on your laptop’s camera, there are a few steps you can take to troubleshoot the issue.
| Troubleshooting Steps |
|---|
| Update or reinstall camera drivers |
| Scan for malware or viruses |
| Reset privacy settings |
| Perform a system restore |
1. Update or Reinstall Camera Drivers
The first step to take when troubleshooting a laptop camera issue is to update or reinstall the camera drivers. Camera drivers are software programs that enable your camera to communicate with your laptop. Outdated or corrupted drivers can cause your laptop’s camera to malfunction or not work at all. To update your camera drivers, you can usually go to the manufacturer’s website and download the latest version. Alternatively, you can use a third-party driver update software program.
2. Scan for Malware or Viruses
Another possible cause of a laptop camera issue is malware or viruses. Malware and viruses can cause a variety of problems, including preventing your laptop camera from working properly. To scan for malware or viruses, you can use a reliable anti-virus program. Be sure to update the program regularly to ensure that you have the latest virus definitions.
3. Reset Privacy Settings
Your laptop’s privacy settings may be preventing your camera from working properly. To check your laptop’s privacy settings, go to your camera’s settings and check the privacy settings. If you find that any of the settings are preventing your camera from working, you can reset the settings to their default values.
4. Perform a System Restore
If none of the above steps have worked, you can try performing a system restore. A system restore will reset your laptop to a previous point in time, which may help resolve any issues that may be preventing your laptop’s camera from working properly.
Alternative Methods for Using a Camera on Your Laptop
If you are still unable to turn on your laptop’s camera, there are other methods you can use to use a camera on your laptop.
| Method | Description |
|---|---|
| External Webcams | Use an external webcam as a separate device to capture pictures and videos on your laptop. |
| Wireless Camera Solutions | Explore wireless camera solutions that don’t require cables and come with their own software. |
1. External Webcams
One option is to use an external webcam. External webcams are small, portable devices that can be used to take pictures and videos on your laptop. They are relatively inexpensive and can be found at most electronic stores.
2. Wireless Camera Solutions
Another option is to use a wireless camera solution. Wireless camera solutions are devices that can be used to take pictures and videos on your laptop without the need for cables. These devices usually come with their own software, which makes it easy to take pictures and videos.
Final Thoughts
If you are having trouble turning on your laptop’s camera, there are several steps you can take to troubleshoot the issue. From updating or reinstalling your camera drivers, to performing a system restore, to using an external webcam or a wireless camera solution, there are many ways to use a camera on your laptop.