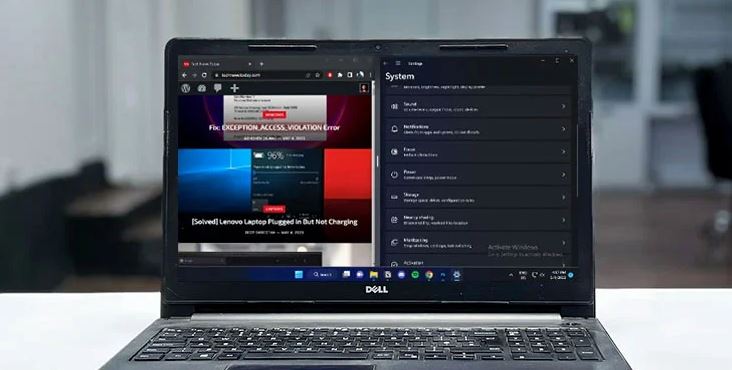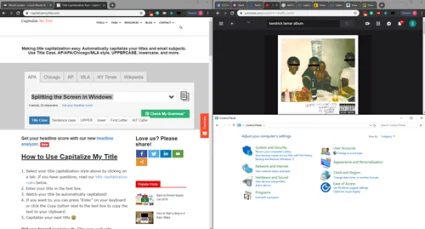
Split screen is a feature available in certain operating systems that allows users to view multiple programs side by side. This can be done on a Dell laptop by utilizing the Windows Snap feature. This feature can be used for a variety of tasks such as comparing documents, multitasking, or simply having multiple windows open at once.
Content of the page
What is Split Screen?
Split screen is a feature that allows users to view two or more applications at the same time. This feature is available in many operating systems, including Windows and Mac OS. Split screen can be used for a variety of tasks, such as comparing two documents side by side, multitasking, or simply having multiple windows open at once.
Why Do You Need to Split Screen on Dell Laptop?
Split screen on a Dell laptop is a useful feature that can help you get more done in less time. With split screen, you can have multiple windows open at once, allowing you to quickly switch between tasks or compare different documents side by side. It can also be used to multitask, such as writing a document in one window while researching in another. Split screen can also be used to view multiple videos or websites at once.
Methods to Split Screen on Dell Laptop
Splitting the screen on a Dell laptop can be a useful way to multitask and view multiple windows at once. This can help you to be more productive and manage your time more efficiently. Dell laptops have several ways to enable split-screen mode, depending on the version of Windows installed.

Method 1: Using Windows Snap Feature
The Windows Snap feature is a simple and intuitive way to split the screen on a Dell laptop. This method is available on all versions of Windows from Windows 7 and onward. Here is a step-by-step guide to splitting the screen on a Dell laptop using the Windows Snap feature.
Step 1: Arrange Two Windows Side-by-Side
The first step is to arrange two windows side by side. This can be done by dragging the windows to opposite sides of the screen. Make sure the windows are touching each other.
Step 2: Resize Windows
The second step is to resize the windows. This can be done by clicking and dragging the window borders. Make sure the windows are the same size.
Step 3: Undo Snap Feature
The third step is to undo the snap feature. This can be done by clicking the Restore button in the upper right corner of the window. This will restore the window to full size.
Method 2: Using Keyboard Shortcuts
The second method for splitting the screen on a Dell laptop is using keyboard shortcuts. This method is available on all versions of Windows from Windows 8 and onward. Here is a step-by-step guide to splitting the screen on a Dell laptop using keyboard shortcuts.
Step 1: Open the First Application
The first step is to open the first application. This can be done by clicking on the application icon or searching for it in the Start menu.
Step 2: Open the Second Application
The second step is to open the second application. This can be done by clicking on the application icon or searching for it in the Start menu.
Step 3: Use the Windows Key + Left/Right Arrow Key
The third step is to use the Windows key + left or right arrow key. This will move the active window to one side of the screen.
Step 4: Adjust Screen Sizes
The fourth step is to adjust the screen sizes. This can be done by using the mouse to click and drag the window borders. Make sure the windows are the same size.
Step 5: Exit Split Screen
The fifth step is to exit split screen mode. This can be done by pressing the Windows key + up arrow key. This will restore the window to full size.
Alternative Methods to Split Screen on Dell Laptop
Splitting the screen on a Dell laptop allows users to work with multiple programs at the same time. This can be done in several different ways, depending on the version of Windows installed. For example, Windows 10 comes with a built-in feature called Snap Assist which allows users to quickly snap two or more apps side by side. However, there are also alternative methods to split the screen on a Dell laptop.
Method 3: Using Third-Party Applications
Third-party applications are also available to split the screen on a Dell laptop. These applications can be downloaded from the internet and offer a variety of features for customizing the display. Some of the most popular applications for splitting the screen on a Dell laptop include AquaSnap, Dexpot, and DisplayFusion.
Step 1: Download and Install a Third-Party Application
The first step in splitting the screen on a Dell laptop using a third-party application is to download and install the application. Most applications are available as free downloads, but some require a paid subscription. Once the application has been installed, it will need to be configured according to the user’s preferences.
Step 2: Configure Split Screen
Once the application has been installed and configured, the user can then begin splitting the screen. This can be done by dragging the windows to the desired position on the screen and then using the application’s features to adjust the size and position of the windows. The user can also use the application’s features to customize the display further, such as changing the background color, adding borders, and more.
Method 4: Using Dell Display Manager
Dell Display Manager is a built-in application that is available on most Dell laptops. It can be used to split the screen on a Dell laptop and customize the display.
Step 1: Download and Install Dell Display Manager
The first step in splitting the screen on a Dell laptop using Dell Display Manager is to download and install the application. This can be done by visiting the Dell Support website and downloading the latest version of the application.
Step 2: Configure Display Settings
Once Dell Display Manager has been installed, the user can then begin to configure the display settings. This can be done by selecting the “Split Screen” option and then dragging the windows to the desired position on the screen. The user can also use the application’s features to customize the display further, such as changing the background color, adding borders, and more.
By using one of these methods, users can easily split the screen on their Dell laptop and make the most of their multi-tasking capabilities. With the help of third-party applications or Dell Display Manager, users can customize their display and make the most of their Dell laptop’s capabilities.
Troubleshooting Split Screen on Dell Laptop
Split screen is a great feature for multitasking on a Dell laptop, but sometimes it can be difficult to troubleshoot when it’s not working properly. This article will explain how to troubleshoot split screen on a Dell laptop, from disabling the Windows Snap feature to resetting display settings with the Dell Display Manager.

Method 1: Troubleshoot Using Windows Snap Feature
The Windows Snap feature is a useful tool that allows you to easily split your screen into two halves. If you’re having issues with split screen, it’s a good idea to first try disabling the Snap feature.
Step 1: Disable Snap Feature
To disable the Snap feature, open the Settings app and go to System > Multitasking. From there, click on the toggle switch next to Allow Windows to snap windows.
Step 2: Reset Snap Settings
Once the Snap feature is disabled, you can reset the settings to their default. To do this, open the Command Prompt and type in the following command:
- netplwiz /snap
This will reset the Snap settings to their default values.
Method 2: Troubleshoot Using Keyboard Shortcuts
If you’re still having issues with split screen, you can try troubleshooting using keyboard shortcuts.
Step 1: Check Keyboard Settings
The first step is to check your keyboard settings. Go to the Control Panel and open the Keyboard Properties. Make sure the keyboard shortcuts you want to use are enabled.
Step 2: Update Keyboard Driver
If the keyboard shortcuts are enabled but you’re still having issues with split screen, you may need to update your keyboard driver. To do this, go to the Device Manager and locate your keyboard. Right-click on it and select Update Driver.
Method 3: Troubleshoot Using Third-Party Applications
If the above methods don’t work, you can try troubleshooting using third-party applications.
Step 1: Update the Application
The first step is to make sure you have the latest version of the application. Check the application’s website for updates and download the latest version if available.
Step 2: Reconfigure Settings
Once the application is updated, try reconfiguring the settings. This may be different depending on the application, so consult the application’s help section for more information.
Method 4: Troubleshoot Using Dell Display Manager
If you’re still having issues with split screen, you can try using the Dell Display Manager.
Step 1: Update Dell Display Manager
The first step is to make sure you have the latest version of the Dell Display Manager. Check the Dell website for updates and download the latest version if available.
Step 2: Reset Display Settings
Once the application is updated, you can reset the display settings. To do this, open the Dell Display Manager and go to the Settings tab. From there, select the Reset Display Settings option.
Conclusion
Split screen on a Dell laptop can be a great tool for multitasking, but it can be difficult to troubleshoot when it’s not working properly. This article has explained four methods for troubleshooting split screen on a Dell laptop, from disabling the Windows Snap feature to resetting display settings with the Dell Display Manager. With a little patience and the right troubleshooting methods, you should be able to get your Dell laptop’s split screen working again in no time.
Summary of Methods
- Method 1: Troubleshoot Using Windows Snap Feature
- Method 2: Troubleshoot Using Keyboard Shortcuts
- Method 3: Troubleshoot Using Third-Party Applications
- Method 4: Troubleshoot Using Dell Display Manager
Benefits of Split Screen on Dell Laptop
The main benefit of split screen on a Dell laptop is the ability to multitask more efficiently. By being able to view two windows side by side, you can easily compare information or switch between tasks. This can save you time when working on multiple projects or researching different topics. Additionally, split screen can also help you keep better organized by allowing you to view multiple windows at once.
Final Thoughts
Troubleshooting split screen on a Dell laptop can be tricky, but with the right steps, you should be able to get it working again. From disabling the Windows Snap feature to resetting display settings with the Dell Display Manager, there are a few methods you can try to get your split screen working again.
