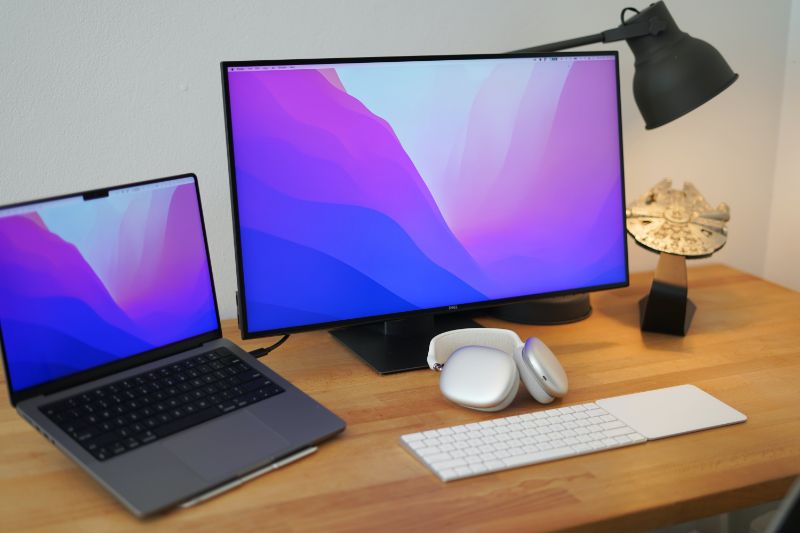
Connect Dell laptop to monitor
Connecting a Dell laptop to a monitor can be an easy and straightforward process. With the right cables and adapters, you can easily connect your laptop to any monitor. In addition to the cables and adapters, there are a few other accessories that you may need to connect your laptop to a monitor.
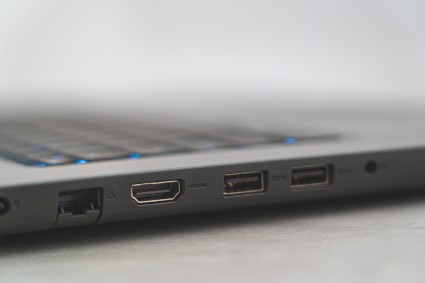
 The type of cable needed to connect a Dell laptop to a monitor will depend on the type of laptop and monitor that you have. Here are some of the most common types of cables and adapters that can be used to connect a Dell laptop to a monitor:
 In addition to the cables and adapters needed to connect a Dell laptop to a monitor, there are a few other accessories that may be necessary.
 Connecting a monitor to your Dell laptop is an easy process that requires the right cables and a few simple steps. There are three main connection types that you can use: VGA, HDMI, and DisplayPort. Depending on the ports available on your laptop and monitor, you can choose which one will work best for you. Once you have the monitor connected, you can configure the settings to get the best picture quality.
 If you are trying to connect a Dell laptop to a monitor but it isn’t working, there are several possible causes. To help you troubleshoot the issue, here are some troubleshooting tips for connecting a Dell laptop to a monitor.
Cables and Adapters
The type of cable needed to connect a Dell laptop to a monitor will depend on the type of laptop and monitor that you have. Here are some of the most common types of cables and adapters that can be used to connect a Dell laptop to a monitor:
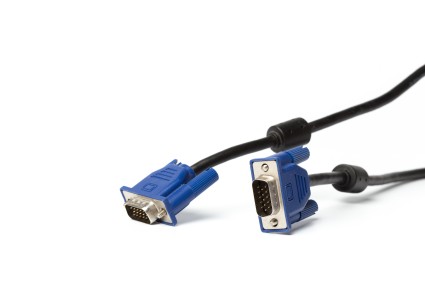
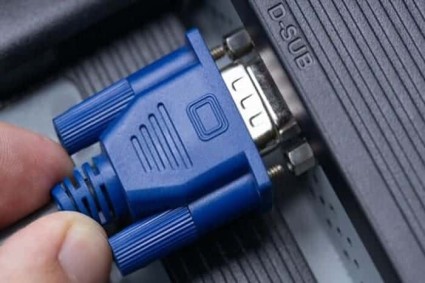
VGA Cables
VGA cables are the most common type of cables used to connect a Dell laptop to a monitor. VGA cables are usually the least expensive option and can be used with most monitors and laptops.HDMI Cables
HDMI cables are also a popular choice for connecting a Dell laptop to a monitor. HDMI cables provide better picture quality and are usually more expensive than VGA cables.DisplayPort Cables
DisplayPort cables are a relatively new type of cable used to connect a Dell laptop to a monitor. DisplayPort cables are more expensive than VGA and HDMI cables, but they offer the highest picture quality available.Other Necessary Accessories
In addition to the cables and adapters needed to connect a Dell laptop to a monitor, there are a few other accessories that may be necessary.
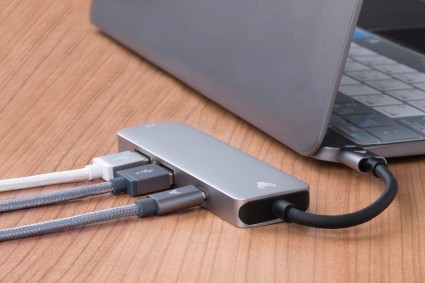
USB Hubs
USB hubs are used to connect a variety of devices to a laptop or monitor. USB hubs provide additional ports for connecting peripherals such as printers and external hard drives.External Hard Drives
External hard drives are used to store and back up data. External hard drives can be connected to a laptop or monitor using USB hubs or directly via USB ports.How to Connect a Dell Laptop to a Monitor Step-by-Step Guide
Connecting a monitor to your Dell laptop is an easy process that requires the right cables and a few simple steps. There are three main connection types that you can use: VGA, HDMI, and DisplayPort. Depending on the ports available on your laptop and monitor, you can choose which one will work best for you. Once you have the monitor connected, you can configure the settings to get the best picture quality.
Step 1: Connect the Monitor to Your Dell Laptop
The first step is to connect the monitor to your laptop. Depending on the ports available on the laptop and the monitor, you will need to use one of the three main connection types.Connecting with VGA
If your laptop and monitor have a VGA port, then you can use a VGA cable to connect them. To do this, plug one end of the VGA cable into the VGA port on the laptop and the other end into the VGA port on the monitor.Connecting with HDMI
If your laptop and monitor have an HDMI port, then you can use an HDMI cable to connect them. To do this, plug one end of the HDMI cable into the HDMI port on the laptop and the other end into the HDMI port on the monitor.Connecting with DisplayPort
If your laptop and monitor have a DisplayPort port, then you can use a DisplayPort cable to connect them. To do this, plug one end of the DisplayPort cable into the DisplayPort port on the laptop and the other end into the DisplayPort port on the monitor.Step 2: Configure the Monitor Settings
Once the monitor is connected to your Dell laptop, you can configure the settings to get the best picture quality.Adjusting Brightness and Contrast
The brightness and contrast settings control how bright or dark the screen appears. To adjust these settings, press the “Menu” button on the monitor and use the Up/Down arrow keys to navigate to the “Brightness” and “Contrast” options. Use the Left/Right arrow keys to adjust the settings.Selecting the Resolution
The resolution setting controls how sharp and clear the picture appears. To adjust this setting, press the “Menu” button on the monitor and use the Up/Down arrow keys to navigate to the “Resolution” option. Use the Left/Right arrow keys to select the desired resolution.Selecting the Orientation
The orientation setting controls how the picture is displayed on the monitor. To adjust this setting, press the “Menu” button on the monitor and use the Up/Down arrow keys to navigate to the “Orientation” option. Use the Left/Right arrow keys to select the desired orientation.Troubleshooting Tips If Your Monitor Is Not Working
If you are trying to connect a Dell laptop to a monitor but it isn’t working, there are several possible causes. To help you troubleshoot the issue, here are some troubleshooting tips for connecting a Dell laptop to a monitor.
| Issue | Troubleshooting Tips |
|---|---|
| Cable connection |
|
| Monitor connections |
|
| Power supply |
|
| Graphic drivers |
|
Check the Cables
The first step in troubleshooting your Dell laptop’s connection to a monitor is to check the cables. Make sure the cable from the monitor is securely connected to the laptop’s video port. If the cable is loose or not properly connected, try removing it and reconnecting it securely.Check the Connections
Next, check the connections on the monitor to make sure they are secure. If the connections are loose, try tightening them to ensure a secure connection.Check the Power Supply
If the connections are secure, the next step is to check the power supply. Make sure the power cable is securely connected to the laptop and the monitor. If the power cable is loose, try disconnecting and reconnecting it.Update Your Graphic Drivers
If the power supply is secure, the next step is to update your graphic drivers. Your Dell laptop may have outdated drivers that are preventing it from connecting to the monitor. To ensure the drivers are up to date, try updating them using the Windows Update Tool or the Dell Drivers and Downloads Tool.Using the Windows Update Tool
To update your drivers using the Windows Update Tool, open the Start menu and type “windows update” into the search bar. Select “Check for updates” and follow the on-screen instructions. This will check for available updates and install the latest drivers.Using the Dell Drivers and Downloads Tool
To update your drivers using the Dell Drivers and Downloads Tool, go to the Dell Support website. Enter your laptop’s Service Tag or choose “Detect Product” to automatically detect your laptop. Select “Drivers and Downloads” and follow the on-screen instructions. This will check for available updates and install the latest drivers. By following these troubleshooting tips, you should be able to get your Dell laptop connected to a monitor. If you are still having trouble, contact Dell Support for additional assistance.Conclusion
Connecting a Dell laptop to a monitor is a simple process that requires just a few steps. First, you will need to identify the ports on both your laptop and monitor. Next, choose the type of cable you will use to connect the two devices. Finally, plug in the cable and adjust the settings on both devices for the best display. With these steps, you can easily connect a Dell laptop to a monitor. If you have any questions or need help troubleshooting, contact Dell’s technical support team or visit their website for more information. Also, make sure to check the user manual for both your laptop and monitor for detailed instructions on how to set up the connection.Dell users often find that once they’ve mastered external display connections on one brand, they become curious about how other manufacturers handle the same setup. Lenovo, for example, takes a slightly different approach depending on the model and available ports. If you’ve recently switched between devices or manage multiple laptops in a shared workspace, this step-by-step guide on setting up a Lenovo laptop with an external monitor offers practical advice worth bookmarking.
Content of the page