Connecting telescope to laptop
Connecting a telescope to your laptop is a great way to get the most out of your telescope and make the most of your viewing experience. With a laptop, you can control your telescope, store and analyze data, and even take pictures and videos of your viewing sessions. In this article, we’ll take a look at what you need to connect your telescope to your laptop, and why you should do it.
Content of the page
Why Connect Your Telescope to Your Laptop?
When you connect your telescope to your laptop, you open up a world of possibilities for your viewing sessions. Here are just a few of the benefits of connecting your telescope to your laptop:
- You can control your telescope remotely, saving you time and effort.
- You can store and analyze data from your viewing sessions.
- You can take pictures and videos of your viewing sessions.
- You can access a range of software programs that can enhance your viewing experience.
- You can access a range of databases that can help you identify stars and galaxies.
Connecting your telescope to your laptop can make your viewing sessions more efficient and enjoyable.
What You Need to Connect Your Telescope to Your Laptop
To connect your telescope to your laptop, you’ll need a few items:
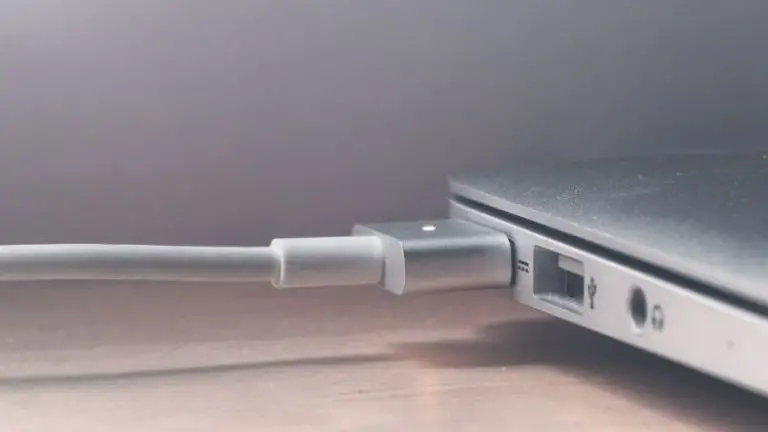
- A laptop with a USB port.
- A USB cable.
- A telescope adapter.
- A software program for controlling your telescope.
Once you have all of these items, you’re ready to connect your telescope to your laptop.
First, plug one end of the USB cable into your laptop and the other end into the telescope adapter. Then, plug the telescope adapter into your telescope. Finally, download and install a software program for controlling your telescope. You can then use the software to control your telescope remotely, store and analyze data, and take pictures and videos of your viewing sessions.
Connecting your telescope to your laptop can open up a new world of possibilities for your viewing sessions. With the right setup, you can control your telescope remotely, store and analyze data, and take pictures and videos of your viewing sessions.
Step-by-Step Guide to Connecting Your Telescope to Your Laptop
Connecting your telescope to your laptop is a great way to take advantage of the power of the telescope. When you connect your telescope to your laptop, you can take advantage of the laptop’s ability to store and process data, as well as its large screen. This allows you to see and analyze data in real time, as well as store and analyze data for later use.
Step 1: Set Up Your Telescope and Mount
The first step in connecting your telescope to your laptop is to set up your telescope and mount. To do this, you will need to assemble the telescope and mount, and make sure that they are securely attached to each other. You will also need to make sure that the telescope is pointed in the right direction and that the mount is level.
Step 2: Install Necessary Software on Your Laptop
Once your telescope is set up and secure, you will need to install the necessary software on your laptop. This software will allow you to control your telescope and capture images from it. The software you will need will depend on the type of telescope you have, so make sure to check the instructions that came with your telescope.
Step 3: Connect Your Telescope to Your Laptop
Once you have installed the necessary software, you will need to connect your telescope to your laptop. This can be done either through a USB cable or through a wireless connection. Again, the exact methods for doing this will depend on the type of telescope you have, so make sure to follow the instructions that came with your telescope.
Step 4: Calibrate Your Telescope
Once your telescope is connected to your laptop, you will need to calibrate it. This is important because it ensures that your telescope is correctly aligned and pointing in the right direction. To do this, you will need to point your telescope at a known star or planet and adjust the alignment until it is accurate. Once your telescope is calibrated, you are ready to start using it.
With a laptop and a telescope, you can get the most out of your stargazing experience. By connecting your telescope to your laptop, you can capture and analyze data in real time, as well as store and analyze data for later use. With a few simple steps, you can easily connect your telescope to your laptop and get the most out of your stargazing experience.
Using Your Telescope with Your Laptop

Connecting your telescope to your laptop is a great way to make the most of your telescope, as it allows you to take full advantage of the power that modern computers can provide. With the right software, you can control the telescope from your laptop, allowing you to take advantage of advanced features that would otherwise be too complicated or time consuming to use.
Software Options for Controlling Your Telescope
There are a few different software options available when it comes to controlling your telescope from your laptop. Each of these options has its own advantages and disadvantages, so it’s important to understand what each one offers and how it can benefit you.
Option 1: Stellarium
Stellarium is an open source planetarium software that can be used to control your telescope. It is free to download and use and provides a wide range of features and functions. It can be used to control the telescope’s movements and to view the night sky from different angles, as well as to create star charts and other images.
Option 2: TheSkyX
TheSkyX is a commercial software package that offers advanced features for controlling your telescope. It is designed for both amateur and professional astronomers, and allows you to control the telescope’s movements, as well as to create star charts, capture images, and view the night sky from different angles.
Option 3: SkySafari
SkySafari is a mobile app that can be used to control and observe the night sky from your laptop. It provides a wide range of features, including the ability to control the telescope’s movements, to view the night sky from different angles, and to capture images.
Benefits of Using Your Laptop with Your Telescope
Using your laptop with your telescope can provide a number of benefits, including:
- The ability to control the telescope’s movements without having to manually adjust the telescope.
- The ability to view the night sky from different angles and distances.
- The ability to capture images and create star charts.
- The ability to use advanced features and functions that would otherwise be too complicated or time consuming to use.
- The ability to use software packages that are specifically designed for amateur and professional astronomers.
Using your laptop with your telescope can help you get the most out of your telescope, and allows you to take advantage of features and functions that would otherwise be too complicated or time consuming to use.
Troubleshooting Common Issues
When it comes to connecting your telescope to your laptop, there are a few common issues that may arise. It’s important to understand the potential problems that may arise and how to troubleshoot them. Below, we’ll discuss some of the most common issues and provide some tips on how to resolve them.
Connection Problems
One of the most common issues when connecting your telescope to your laptop is connection problems. This can be caused by a variety of factors, such as a poor connection between the telescope and the laptop or incorrect settings. To troubleshoot this issue, make sure that you have the correct cable and settings, and try changing the USB port that you are using. If the problem persists, try restarting your laptop or updating the drivers.
Software Issues
Another potential issue is software related. Some software may not be compatible with your telescope or laptop, or may require additional drivers or software updates to work correctly. To resolve this issue, make sure that you are using the correct software and that you have the latest version installed. Additionally, make sure that you have the correct drivers installed for your telescope.
Alignment Problems
Finally, alignment problems may arise if the telescope is not correctly aligned with the laptop. To resolve this issue, make sure that the telescope is correctly aligned with the laptop and that the telescope is pointing in the correct direction. Additionally, make sure that the telescope is correctly calibrated and that the settings are correct.
Conclusion
Final Thoughts on Connecting Your Telescope to Your Laptop
Connecting your telescope to your laptop can be a great way to get the most out of your telescope. However, it is important to understand the potential issues that may arise and how to troubleshoot them. By understanding the potential connection, software, and alignment issues, you can ensure that your telescope is correctly connected to your laptop.
The Benefits of Connecting Your Telescope to Your Laptop
Connecting your telescope to your laptop can provide numerous benefits. For example, it can allow you to take advantage of advanced software and features, such as real-time tracking and 3D imaging. Additionally, it can provide you with a much larger screen than a standard telescope, allowing you to get a better view of the night sky. Finally, it can provide access to a variety of online resources, such as star charts and astronomy forums.