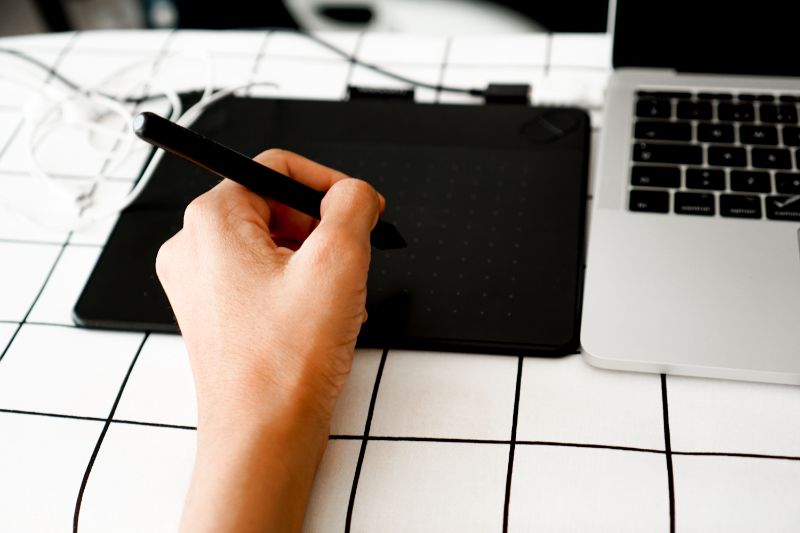
How to calibrate a Wacom tablet
Calibrating a Wacom tablet is an important step in ensuring that the tablet accurately tracks your movements and inputs. This is especially important for digital artists, animators, and graphic designers who use the tablet in their creative work. Calibrating your tablet can help improve the accuracy of your work and make it easier to use. This guide will walk you through all the steps necessary to properly calibrate your Wacom tablet.
Content of the page
Checking your Pen Settings
The first step in calibrating your Wacom tablet is to check your pen settings. You can do this by accessing the Wacom Tablet Properties in the Windows Control Panel or by using the Wacom Desktop Center. Once you’ve accessed the settings menu, you can adjust the pressure sensitivity, click speed, and other settings to your liking.
Adjusting the Display Settings
The next step is to adjust the display settings on your Wacom tablet. You can do this by accessing the Display Settings menu in the Windows Control Panel or by using the Wacom Desktop Center. Here, you can adjust the brightness, contrast, and color settings of the display to your liking.
Calibrating the Tablet
Once you’ve adjusted the pen and display settings, it’s time to calibrate your tablet. You can do this by accessing the Calibration menu in the Windows Control Panel or by using the Wacom Desktop Center. Here, you can adjust the accuracy of the tablet by adjusting the X and Y axis settings. You can also adjust the area of the active area of the tablet to ensure that you get the most accurate tracking possible.
Testing the Calibration
Once you’ve calibrated your tablet, you should test it to make sure that it’s working correctly. To do this, you can use a drawing program such as Adobe Photoshop or Corel Painter to draw a few lines and check if they’re accurate. You should also test the pressure sensitivity of the tablet by using the pen to draw a few circles and check if they’re the same size.
How to Calibrate a Wacom Tablet
Calibrating your Wacom tablet is an essential step to ensure that your pen and tablet are working together as accurately as possible. Calibration requires a few simple steps that will ensure that the cursor on your monitor follows the movements of the pen on your tablet. With the right software and settings, you can easily calibrate your Wacom tablet and have it working like new again.
Choose the Right Software for Calibration
Your Wacom tablet comes with the necessary software to get it up and running. This includes the Wacom Tablet Driver, which is used to calibrate the tablet. The driver will allow you to adjust settings such as the pen’s pressure sensitivity and the tablet’s active area. This is the first step in calibrating the tablet.
Set Up Your Wacom Tablet for Calibration
Once you have installed the Wacom Tablet Driver, the next step is to set up your Wacom tablet for calibration. This includes connecting the tablet to your computer and installing the necessary software.
Connect Your Wacom Tablet to Your Computer
The first step is to connect your Wacom tablet to your computer. This can be done with either a USB or a wireless connection. Once the tablet is connected, you can then install the Wacom Tablet Driver.
Install the Wacom Tablet Software
The Wacom Tablet Driver is necessary for calibrating your Wacom tablet. Once it is installed, you can then adjust the settings for the tablet. This includes setting the pressure sensitivity of the pen and the active area of the tablet.
Verify the Wacom Tablet Settings
Once the Wacom Tablet Driver is installed, you can then verify the settings for the tablet. This includes checking the pressure sensitivity of the pen and the active area of the tablet. This is done in the Wacom Tablet settings window.
Calibrate Your Wacom Tablet
Once all of the settings are set up, you can then begin to calibrate your Wacom tablet. This requires a few simple steps that will ensure that the cursor on your monitor follows the movements of the pen on your tablet.
Adjust the Calibration Settings in the Wacom Tablet Software
The first step is to adjust the calibration settings in the Wacom Tablet software. This includes setting the pressure sensitivity of the pen and the active area of the tablet. Once the settings are adjusted, you can then proceed to the next step.
Check the Calibration Results
Once the calibration settings have been adjusted, you can then check the calibration results. This is done by testing the accuracy of the pen and tablet by drawing a straight line on the tablet and checking to see if it is accurately displayed on the monitor.
Troubleshoot Any Issues with Your Wacom Tablet
If there are any issues with your Wacom tablet, such as the pen not being accurately displayed on the monitor, then you can troubleshoot the problem. This can be done by adjusting the calibration settings in the Wacom Tablet software. You can also check to make sure that the connection between the tablet and the computer is working correctly.
Why Calibrate a Wacom Tablet?
Calibrating a Wacom tablet is an important step in setting up your digital drawing space. Without proper calibration, you’ll find that your tablet is not accurately tracking your pen movements. This will lead to inaccurate lines, lagging, and general frustration when drawing. Fortunately, calibrating your tablet is a straightforward process that only takes a few minutes.
The most important reason to calibrate your Wacom tablet is to ensure that your tablet is accurately tracking your pen movements. Without calibration, your tablet may be off by a few pixels, which can lead to inaccurate lines and other issues. This can be especially problematic for artists and designers who depend on precise lines and shapes.
Calibrating your tablet is also important for helping ensure that your pen is properly calibrated. Your pen should be calibrated to your tablet so that it is properly tracking your movements. If your pen is not calibrated correctly, you may experience lagging or skipping, which can be very frustrating when drawing.
Finally, calibrating your Wacom tablet can also help you get the most out of your tablet’s pressure sensitivity. Pressure sensitivity allows you to vary the thickness of your lines depending on how hard you press your pen against the tablet. This is very helpful for creating natural-looking drawings and paintings.
How to Calibrate a Wacom Tablet
Calibrating your Wacom tablet is a relatively straightforward process that only takes a few minutes. The first step is to open the Wacom Tablet Properties software. This can be found in the Windows Control Panel or in your system tray.
Once you have the Wacom Tablet Properties open, you’ll need to select the Calibrate tab. Here, you’ll see a number of settings that you can adjust to calibrate your tablet. The first setting is the “Calibration Point.” This is the point where your pen and tablet are most accurately calibrated. You’ll need to set this to the point where your pen is tracking the most accurately.
The next setting is the “Sensitivity.” This setting determines how sensitive your pen is to pressure. You’ll want to experiment with this setting until you find the right balance between accuracy and speed. If you’re having trouble finding the right setting, you can always use the “Auto” setting to have the software automatically adjust the sensitivity for you.
The final setting is the “Button Mapping.” This setting determines which buttons on your pen will do what when pressed. You can adjust this setting to suit your needs, but the default settings should work fine for most users.
Once you have all of your settings adjusted, you can click the “Calibrate” button to save your settings and begin calibrating your tablet. The calibration process will take a few minutes, and you’ll need to follow the on-screen instructions. Once the calibration is complete, your Wacom tablet will be ready to use.